
We left you in the last blog of our boat engine rebuild, having discovered oil leaking from around the timing case cover. When we investigated, we found a tear in the gasket that sits between the case and the engine. We’d just been at the point where we were ready to set the engine upright, so to say it was a disappointing setback was a huge understatement.
We took a moment to lick our wounds. After that, there was nothing else for it but for us to get on with taking it apart. After all, there was no one else to do it for us. And, the sooner we got started, the sooner we could get back to making forward, rather than backwards progress.
The Timing Case Gasket Tear
In order to replace the timing case gasket we had to remove everything on the front end of the engine, including the fuel injection pump. We also disappointingly, had to take the newly installed oil sump off. Why, you might wonder? Well, it’s all to do with the front crankshaft nut, which had to come off to get the timing case off. During its fitting, we’d torqued the nut to 300nm, so it was going to require a lot of opposite pressure to loosen it. To provide a counter force, we had to hold the crankshaft firmly in place to then be able to turn against it. With the engine as it was, the only way to do that was to wedge a lump of wood under the crankshaft to stop it turning. And to access the crankshaft, the oil sump had to come off.
In our favour, we did have a spare set of gaskets, so we didn’t need to wait for replacements to arrive.
Should We Use Gasket Glue or Not?
We had used black RTV gasket glue on both the timing case gasket and the oil sump gasket. We couldn’t be definitively sure about what had led to the tear, but we strongly suspected it was the RTV. Our guess is that the glue had started to go off because we took our time in fitting the timing case. We were novices, going slowly was all we could do. Once the glue starts to go off, it loses its flexibility. As we tightened and torqued the bolts around the timing case, the gasket would have needed to move slightly and settle into place. If the glue was preventing any movement, then it could have led to the tear.
We didn’t have any other type of gasket glue, nor was any other available on the island. We could have ordered a different product in, but we didn’t want to wait for the typical delivery times. Also, remember the forum war we had inadvertently started? It was all about whether to use gasket glue or not. Plenty of people had said they never used it, so having suffered from using it, we decided to give the no-glue camp a chance. So, we chose to refit both the timing case gasket and the oil sump gasket without using any other sealant.
We lost a week to remove, clean up the gasket glue and refit back to the point of being ready to turn the engine upright again.

The Valves
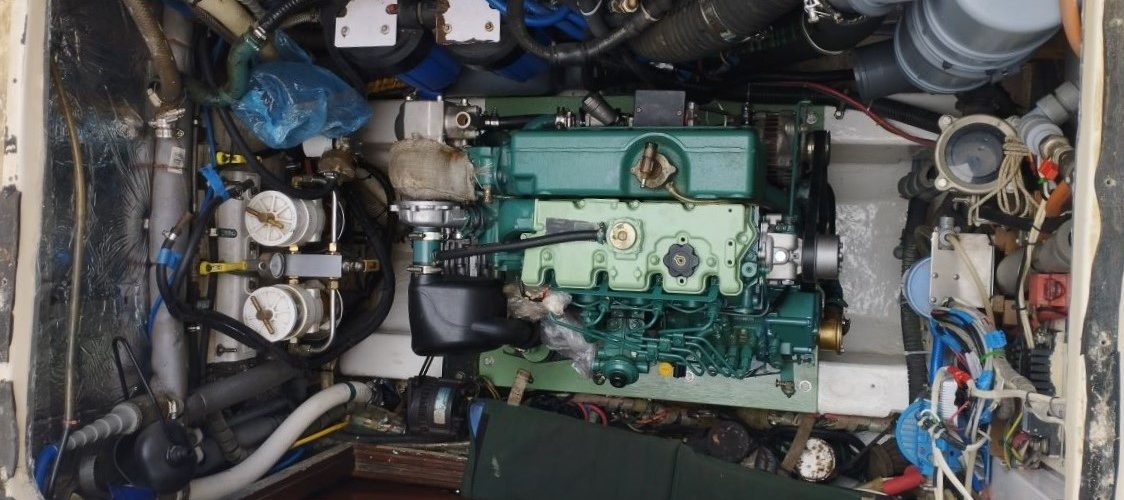
It took an army of 6 men to pick the engine up and literally manhandle it upright. With the engine now sitting the correct way up, we could get the head back on with a new gasket. Over the last few months, Colin has taken the head on and off several times. It is now a job he is very skilled at!
Within the head are the valves. They move up and down as the camshaft rotates, opening and closing. In doing so, they either allow air in to the engine, or allow exhaust gases to leave.
They have a long, thin stem attached to a flat cone of metal at one end. When the salt water entered the engine, it would have passed the valves and hence they were showing a little rust damage. They also had signs of coke build up from their years of use. It seemed like a good idea to take the opportunity to replace them. Also, we thought that one of the valve’s stems looked slightly bent.
Valve Lapping
Removing and refitting a valve is an awkward job. It involves a strange looking tool (called a valve spring compressor) and patient precision with pliers to fit the tiny, fiddly collets.
When you buy a valve, the edges of the cone need to be ground to ensure a tight fit between itself and the valve seat. This is called lapping. A paste is used with different gradients, first a coarse one followed by a fine. Using a lapping stick, the paste is ground into the valves, removing a fine layer from them. It’s a fascinating process. As the tool spins the paste into the valve, it emits a graunching sound. When the sound goes away, you’ve removed enough material.
It was one of our big surprises to find both the tool and the lapping paste available to buy on the island.

Adjusting the Valve Clearances
With the valves lapped and in place, the next step was to adjust the valve clearances. These are small gaps between the top of each valve and the mechanism in the rocker that presses on them. If the gap is too big, then gases could leak out of the combustion chamber, affecting the engine’s performance.
It took a fair bit of studying to understand the process. However, after watching several YouTube videos and writing things out, it began to clarify in our minds. The valve clearances are something that should be checked occasionally to ensure the engine is giving its best performance, so it is a useful skill to have.
Once we’d adjusted the valve clearances, we put the rocker cover back on. This completed the work on the engine’s head.

The Holey Oil Pipe
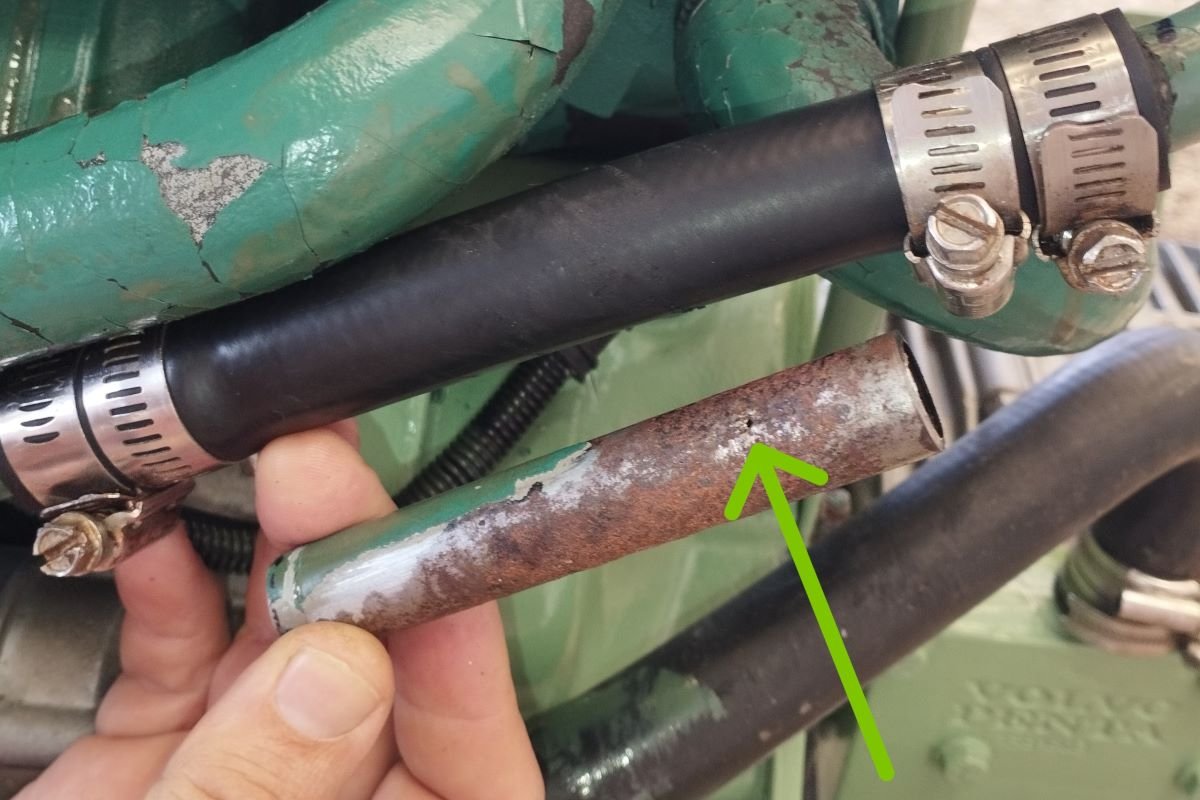
The last large component to go on was the heat exchanger. This was followed by the no-longer-holey gear box, whose repair deserves a whole blog to itself. Then there were various smaller parts to refit, including the turbo and exhaust elbow, the starter motor and a new water pump. There was also the issue of the small hole that we’d found in the turbo oil pipe return. A new pipe costs several hundred pounds, crazy for what it is. We felt that we could engineer a suitable repair for a fraction of that cost.
The repair involved cutting away the damaged section of metal pipe. We then used a piece of flexible oil hose, cut longer that the removed section to allow for a good overlap over the remaining parts of the pipe. To ensure a really tight fit, we then clamped the hose tight using jubilee clips.
We can’t see any reason why this fix will leak. However, we plan to fit a longer term solution using after market turbo fittings at some point. This is something that we can do with the engine back in the boat, if all goes well with the rebuild.
Feeding Victor His Vital Fluids
With the oil sump fitted, the engine upright and various engine components back in place, we’d reached the momentous point where we could feed the engine with oil. The oil is there to add lubrication and assist metal to move smoothly over metal surfaces. Although we’d spun the crankshaft by hand using the crank nut, we were wary of doing too much with only a tiny amount of oil within the engine body.
Colin poured in the full amount of oil specified for the engine. Then we waited overnight for it to run and settle into all the places it needed to go. We’d laid out paper towels under the engine to help us spot any potential leaks.
The Oil Sump is Leaking
The next morning we went into the shed full of hope, to have it swiftly knocked for six. There, under the front of the oil sump, was a circular patch of oil.
We looked closer and found oil to be leaking from not just one or two spots, but from all around the oil sump. We could actually see it very slowly seeping out from between the gasket and the engine body. The gasket looked strange – it was wavy, rather than lying flat against the engine body. It was a puzzle as to how it had deformed in that way.
The answer came after taking the oil sump off. We could now see that the rim of it had been deformed upwards around each of the bolt holes. The result was that rather than a flat edge to push up against the gasket, the rim now had an undulating surface.
We came up with the following possible issues for why the oil had leaked out:
- Inferior quality of the replacement oil sump. The metal had deformed as the bolts were tightened.
- Bottoming out of the sump bolts against the inside of their holes. This could be due to using a thinner gasket and the thinner material of the replacement oil sump.
- Not using any gasket sealant. Our previous bad experience with using sealant on the timing case gasket had led us to not use it when fitting the oil sump for the second time.
- The gasket itself. The gasket was part of an after market rebuild kit and seemed noticeably thinner than the one we had taken off.
It could have been just one of the above that was the problem, or the perfect storm of some of them combined.

Third Time Lucky For the Oil Sump Gasket?
Given that we didn’t know what had caused the oil sump to not seal correctly, we set about tackling each of the potential issues.
Back to the Old Oil Sump
We’d replaced the old oil sump because it was rust damaged at one end where the salt water had gathered and sat. It also had a large dink from some unknown past incident. However, when we compared it to the new sump, the old one was obviously of much better quality in the thickness of the material used. It had seemed like a simple solution to replace it, but perhaps components just aren’t made the same way they were 20 years ago.
Colin gently tapped out the area with the dink. He needed to do this because the indent was close to where the oil extraction pipe fits and we were worried that the pipe wouldn’t sit correctly due to it.
To repair the rust damage, Colin sanded back the affected area to shiny metal and cleaned it with acetone. He then gave it a coat of PUR engine paint before spray painting with an oil and high temperature resistant paint. It looked like new.

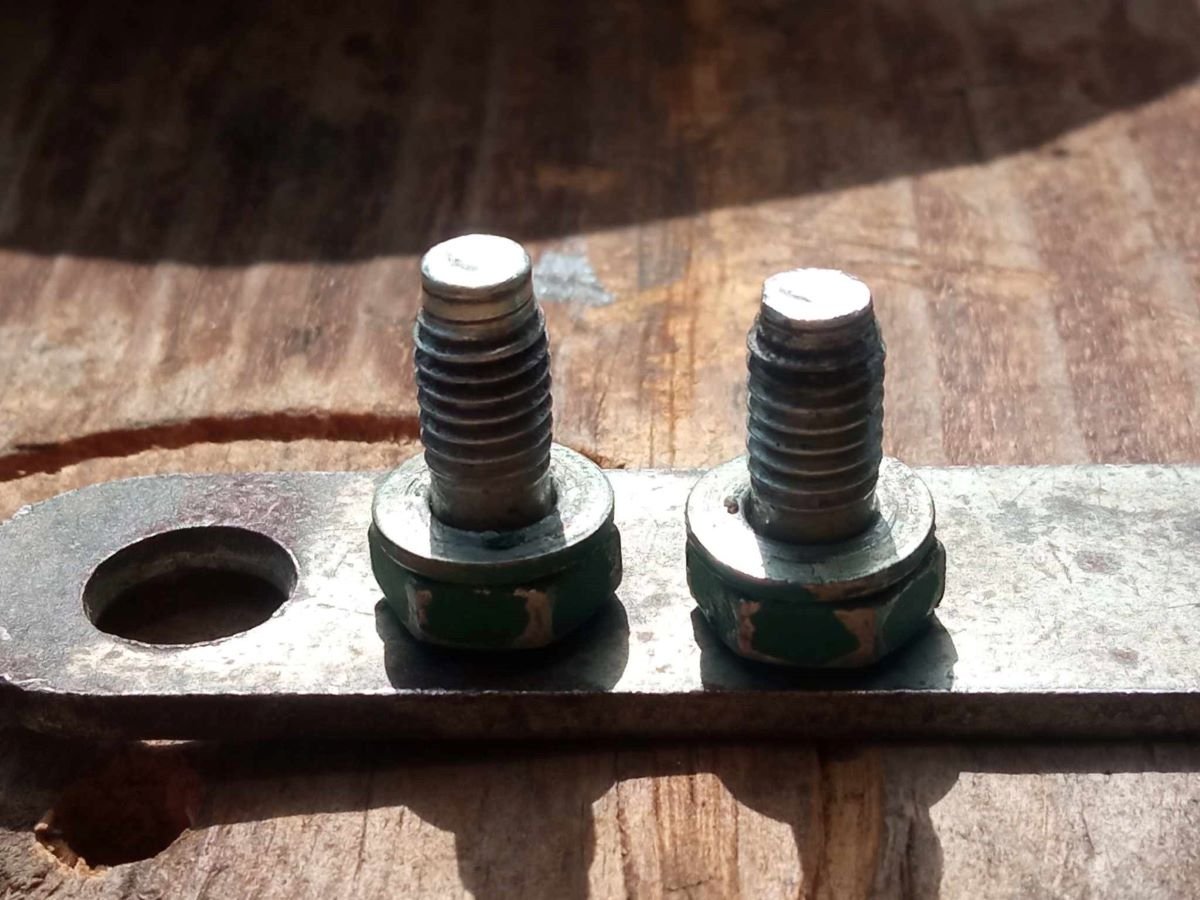
Reducing the Bolt Height
There are thirty sump bolts. The bolts are threaded, and on the end is a thinner section without any threads. To remove the risk of the bolts bottoming out, Colin ground the ends down a few millimeters, thus reducing their height.
Gasket Sealant
We decided that we would use a sealant this time round. However, we were still wary of using the RTV we’d used before because we were concerned about the time we would have to fit the sump before the sealant began to go hard. The temperature in the shed in which we were working was rising as we moved towards summer. Plus, we were working with constrained access to the bottom of the engine, and it just wasn’t possible to work quickly. So, time and working temperature were not in the RTV’s favour.
Other products were suggested to us, and in the end we went with Hylomar Blue. The Hylomar has unlimited assembly time which was perfect for our situation. We also bought a tube of Stag Wellseal as a backup in case the Hylomar didn’t work.
New Gasket
Those who also own a Volvo engine will know that the price of spare parts is ludicrously high. However, our engine is actually a marinized Perkins engine which are widely used in industrial vehicles, for example, small diggers. Perkins parts are much cheaper than the equivalent Volvo part. Aftermarket, unbranded parts are also available. In the past this has worked well for us, we’ve replaced various parts for a fraction of the cost of buying from Volvo.
However, the oil sump gasket worried us. So, we gritted our teeth and bought the official Volvo sump gasket. We do admit, the quality of the gasket material used is much better.
Putting it All Together
To refit the sump Colin squeezed out a bead of Hylomar Blue on both the raised rim of the original sump and the top of the new gasket. This meant there would be a layer of sealant between both sides of the gasket and the metal faces of the sump and the engine body. We waited the required ten minutes for the solvents in the product to off gas.
We’d already done a dry run to ensure that there was enough clearance to pass the sump under the engine body. Colin had screwed short lengths of threaded bar into two of the bolt holes to help guide it into place. Once in place, he had several pieces of wood ready to wedge underneath. These would hold it whilst he got the first few bolts in. Then it was a matter of fitting all of the bolts hand tight, before going back around and torquing them to the specified value. We inspected the gasket and it looked nice and flat against the bottom of the engine. This was a very positive sign.
We then left the sump to settle for 24 hours. The next day we added oil again to the engine and laid out clean paper towels underneath. Despite having done everything we could to make the refitting of the sump right, we were still nervous.

A Nervous 24 Hours
With a mixture of excitement and trepidation, we returned to the engine the next morning. We lifted the tarp that protects the engine from yard dust, and peered underneath. The white paper was sprinkled with some dots of said dust, but we couldn’t see any oil spots. Of course, we then also checked closely around the gasket, running a finger along places we couldn’t see. The fingers came back dry and there were no glimmering signs of oil seeping out from around the gasket.
Although this was an enormous relief, we did still check for oil leaking every day for the next few days. And every day there was no sign of any oil.
Testing the Engine
We’ve watched YouTube videos of engines like ours running without being connected in to a boat. So, it could be possible for us to remotely rig up the ancillary systems needed to do this. However, we’ve decided to reinstall the engine back into the boat to test it. We’d have to take so many systems out of the boat to run it remotely, which seems very destructive and time consuming. It also helps that the crane is very affordable and can be there the same day. So, if the engine did have to come out again, it could with less effort than removing and then reinstalling the ancillary systems.
Although we couldn’t test if the engine ran fully, we could test if it turned over. To do this, we connected a battery to the starter motor. After a tiny spark, the crankshaft pulley began to spin. It sounded like the parts were turning smoothly and there was a wonderful absence of screeching noises.
We could also feel regular puffs of air coming out from each of the injector holes. A few weeks ago, we used the same method to run a compression test on each cylinder. To do this, we inserted a pressure gauge into each injector hole, then started the engine from a battery. The gauge measures the amount of pressure in the piston cylinder and can help identify a problem with the piston. We were happy that the readings given were within the tolerance ranges specified in the manual.
The Fuel Injector Lines
The last parts to fit before the engine was able to go back into the boat were the fuel injectors and the feed lines. The injectors are like spark plugs and needed yet another tool that we or the yard didn’t have. Cue a cycle around the various hardware stores to find what we needed, we were in luck.
The trickiest part was fitting the fuel leak off pipe and the spider like injector fuel lines. Unfortunately, during its removal, the leak off pipe was accidentally bent slightly out of alignment. It is both fragile and strong, which makes bending it back into shape extremely tense. If it isn’t in the correct shape, then the rings won’t fit on top of the injectors. Eventually, with extreme patience and by adjusting it by just a tiny amount each time, Colin got it to slot on smoothly.
The injector fuel lines are a little easier to adjust, but still fragile and also expensive to replace. There were big sighs of relief all around once they were on.


The Engine is Ready to Return to the Boat
The last few jobs had only taken a few days of work. It was knowing that we’d been so close to completion when the oil sump leaked, that had really added to the frustration as we waited for weeks for replacement parts to arrive. But now here we were, a little over six months since the engine had been removed, with it ready to be craned back into the boat. We were quite giddy with cautious excitement. Cautious because first there was getting the engine back in to the boat. Although we trusted the yard’s equipment, it is still an anxious few minutes to see your precious lump of metal floating high in the sky.
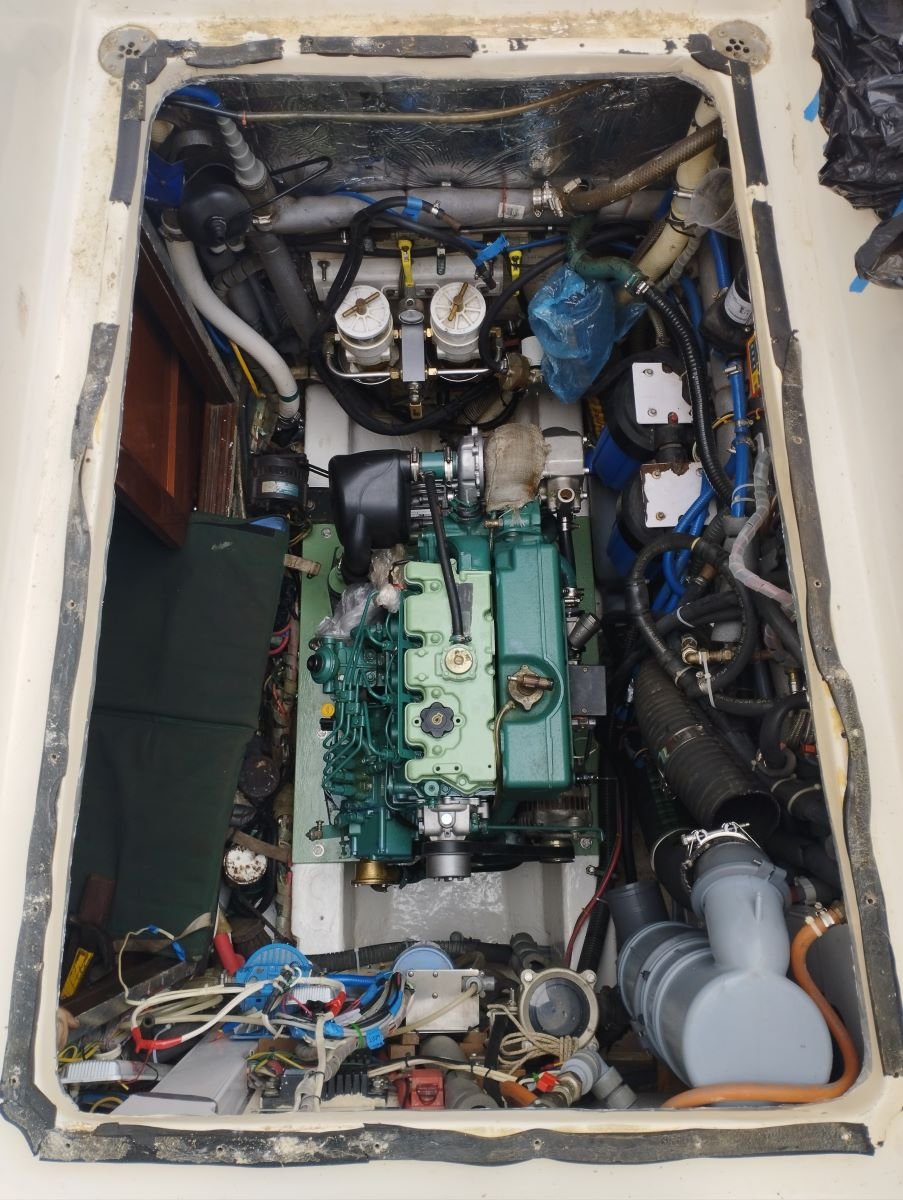
With heart in mouth we watched the crane pick the engine up and gently return it to the engine room. The yard guys did an excellent job and handled Victor with care.
This was a wonderful milestone to have reached, but we couldn’t celebrate fully yet. We now have a few days of work to reconnect all of the ancillary systems needed to fully test run the engine. That’s the exhaust, the salt water cooling, the fresh water cooling, the fuel pipes, the wiring looms and the control cables. There are still things that can go wrong, and working in the close confines of the engine room isn’t easy.
The Social Media Bit: Want to Follow Us?
If you’d like to follow us on other social media platforms (Facebook, Instagram and YouTube), you can do so by using these links:
Or use the link below to track our voyage on NoForeignLand.com.

And finally, you can sign up to receive email notifications of new blogs using the subscribe box at the bottom of this page.
Thank you from Nichola & Colin